


Guide: Calorie Counting by Photo
Introduction
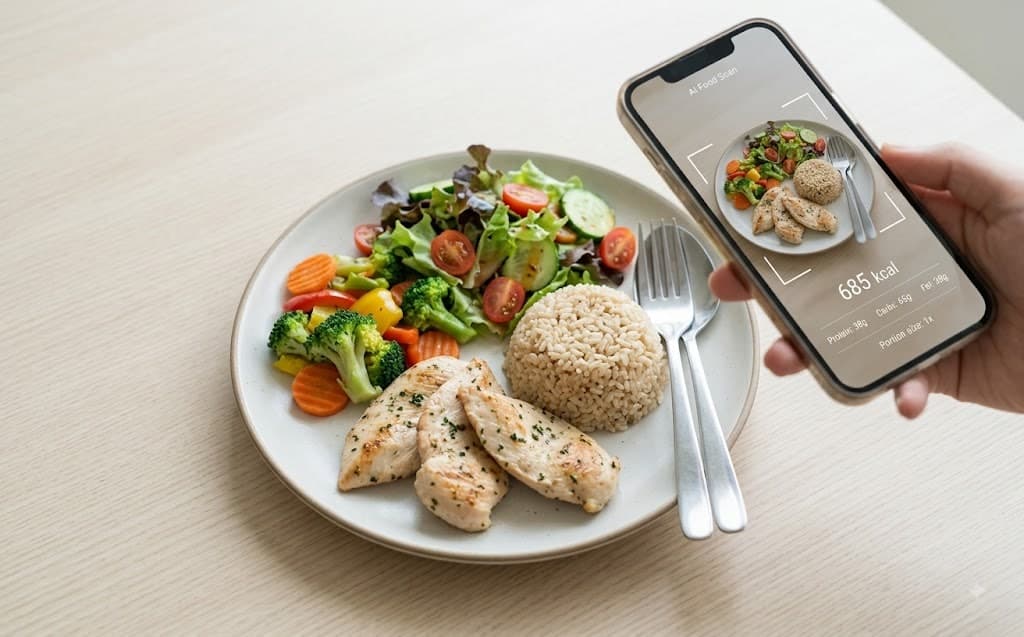
Instead of searching for every ingredient in a database, measuring teaspoons of oil, and calculating everything manually, you can simply take a photo of your plate and get a complete calorie breakdown. It sounds simple—and it really is—but the quality of the result depends directly on the quality of the photo you take.
A quick, unclear photo produces a rough estimate. A properly taken photo provides a number you can actually use to build your meal plan. Here's exactly how to do it correctly, step by step.
Step 1: Arrange Your Plate Before Taking the Photo
Preparation starts before you even open the camera. A few seconds of arranging the plate can make a significant difference in the result.
- Place the food on a simple plate without colorful patterns that could interfere with image recognition.
- Separate the ingredients as much as possible so that rice, protein, and vegetables are visible individually rather than stacked on top of one another.
- Remove spoons, hands, or other objects from the frame unless they're being used as a size reference.
- If there is sauce or seasoning, try to keep it visible rather than letting it become completely absorbed into the dish.
Step 2: Choose the Right Angle and Lighting
How you take the photo directly affects the portion-size estimation.
- Take the photo from above, using a straight overhead angle whenever the dish allows it.
- Use natural light or strong lighting, and avoid dark rooms or heavy shadows over the food.
- Fill the frame with the plate, without too much unnecessary background that makes the food appear smaller than it actually is.
- Keep the camera steady to prevent blurring that could make ingredient recognition more difficult.
For deep dishes, such as soup or stew in a bowl, a slight side angle in addition to the overhead view can help capture the volume more accurately.
Step 3: Add a Size Reference if Needed
Visual estimation relies on scale, and everyday objects can help calibrate the size more accurately.
Simple and useful references include:
- A fork or spoon placed at the edge of the plate
- A coin or a hand placed next to the food without covering it
- A plate of known size, since a full serving on a small plate looks very different from the same serving on a large plate
This is especially useful for foods without an obvious size reference, such as a pile of rice or a serving of pasta, where volume is difficult to estimate from the food's shape alone.
Step 4: Take the Photo and Let the System Process It
Once the plate is ready and you've chosen the angle, this step is simple:
- Open the image-scanning feature in the app.
- Take the photo following the preparation steps above.
- Wait a few seconds while the system identifies each ingredient and estimates its quantity.
- Review the breakdown that appears on the screen.
Most tools will break the meal down into individual ingredients, with an estimated calorie and nutritional value for each one, rather than providing just one total number for the entire plate.
Step 5: Review and Correct the Breakdown
This is the step most people skip—and it's also the one that can improve accuracy the most over time.
- Check that each ingredient was identified correctly. A particular stew might be identified as generic vegetables when it actually contains meat and oil.
- Correct the portion size if it looks wrong. If the system estimated a portion that is too small or too large, manually correcting it fixes the current record and may improve future estimates for similar meals.
- Add ingredients that aren't visible in the photo, such as cooking oil or dressing mixed into a salad, because they can contain significant calories that a photo alone may not detect.
A quick 10-second review can turn a rough estimate into a number you can rely on.
Step 6: Save the Record and Track the Trend
Once the breakdown looks accurate, save it to your daily log. Over time, this is where photo-based tracking becomes truly powerful.
- Daily totals build a weekly average, which is often more important for your goals than any single meal.
- Repeated meals can be recognized more quickly as you use the system more.
- Patterns become clearer, such as which meals consistently contain more calories than you expected.
Recording one photo at a time may feel insignificant in the moment, but the accumulated data can build a clear picture of your actual eating habits within just a couple of weeks.
Common Mistakes to Avoid
A few small habits can repeatedly reduce the accuracy of photo-based tracking.
- Photographing a plate that has already been partially eaten, which can lead to underestimating the original portion.
- Taking the photo from too far away, making it harder for the system to identify fine details.
- Skipping sauces, oils, and toppings because they seem insignificant, when they can actually account for a large portion of the meal's calories.
- Failing to correct obvious mistakes, allowing the same error to repeat meal after meal instead of improving over time.
None of these mistakes requires much effort to avoid—just a little attention before and after taking the photo.
Conclusion
Photo-based calorie counting isn't simply about taking a picture and trusting every number that appears. It's a short process: arrange the plate, choose the right angle, use good lighting, add a size reference when needed, and quickly review the result. Together, these steps turn an AI estimate into an estimate that's actually worth recording.
Once this habit becomes part of your routine, logging meals stops feeling like a chore and starts feeling like a five-second step in your day.
Ready to try it yourself? Open the calorie-tracking app and photograph your next meal using the steps explained here.