


How To Count Calories From A Photo (Step By Step)
Introduction
Typing every ingredient into a food diary is one of the fastest ways to quit tracking altogether. Counting calories from a photo removes that friction entirely. Instead of searching, measuring, and calculating, you take one picture and get a breakdown of calories, protein, carbs, and fat in seconds.
But the results are only as good as the photo behind them. A rushed, blurry shot from a bad angle gives a rough guess. A well-taken photo gives you numbers you can actually build a diet around.
Here's the exact process, step by step, to get accurate calorie counts from your meals using nothing but your phone camera.
Step 1: Set Up Your Plate Before You Shoot
Accuracy starts before the camera even opens. A few seconds of setup makes a real difference in the result.
- Place your meal on a plain plate or bowl, avoiding busy patterns that confuse image recognition
- Separate mixed items where possible, keeping rice, protein, and vegetables visibly distinct rather than piled together
- Remove your hand, utensils, or other objects from the frame unless they're being used as a size reference
- If sauces or dressings are added, try to keep them visible rather than fully absorbed into the food
This step takes less time than plating a meal for a photo you'd post online, but it matters far more for the number you get back.
Step 2: Get the Right Angle and Lighting
Once the plate is ready, how you photograph it directly affects portion estimation.
- Shoot from directly above (a top-down angle) whenever the meal allows it, since this gives the clearest view of portion size
- Use natural or bright indoor light, avoiding dim rooms or strong shadows across the food
- Fill the frame with the plate, without excessive background space that makes the food appear smaller than it is
- Hold the camera steady to avoid blur, which can cause misidentification of ingredients
For deep bowls or layered dishes, a slight angle showing the side of the bowl alongside a top-down view helps capture volume that a flat top shot alone might miss.
Step 3: Add a Size Reference When Needed
Photo-based calorie counting estimates portion size visually, and everyday objects help it calibrate scale accurately.
Useful, simple references include:
- A standard fork or spoon placed at the edge of the plate
- A coin or a hand resting just outside the food, not covering it
- A known plate size, since a full plate on a small side dish looks very different from the same portion on a large dinner plate
This step matters most for foods without an obvious size cue, like a mound of rice or a scoop of pasta, where scale is harder to judge from the food alone.
Step 4: Capture the Photo and Let the AI Process It
With the plate set and the shot framed, this part is simple:
- Open your calorie-tracking app's photo scan feature
- Take the photo following the setup from steps 1 through 3
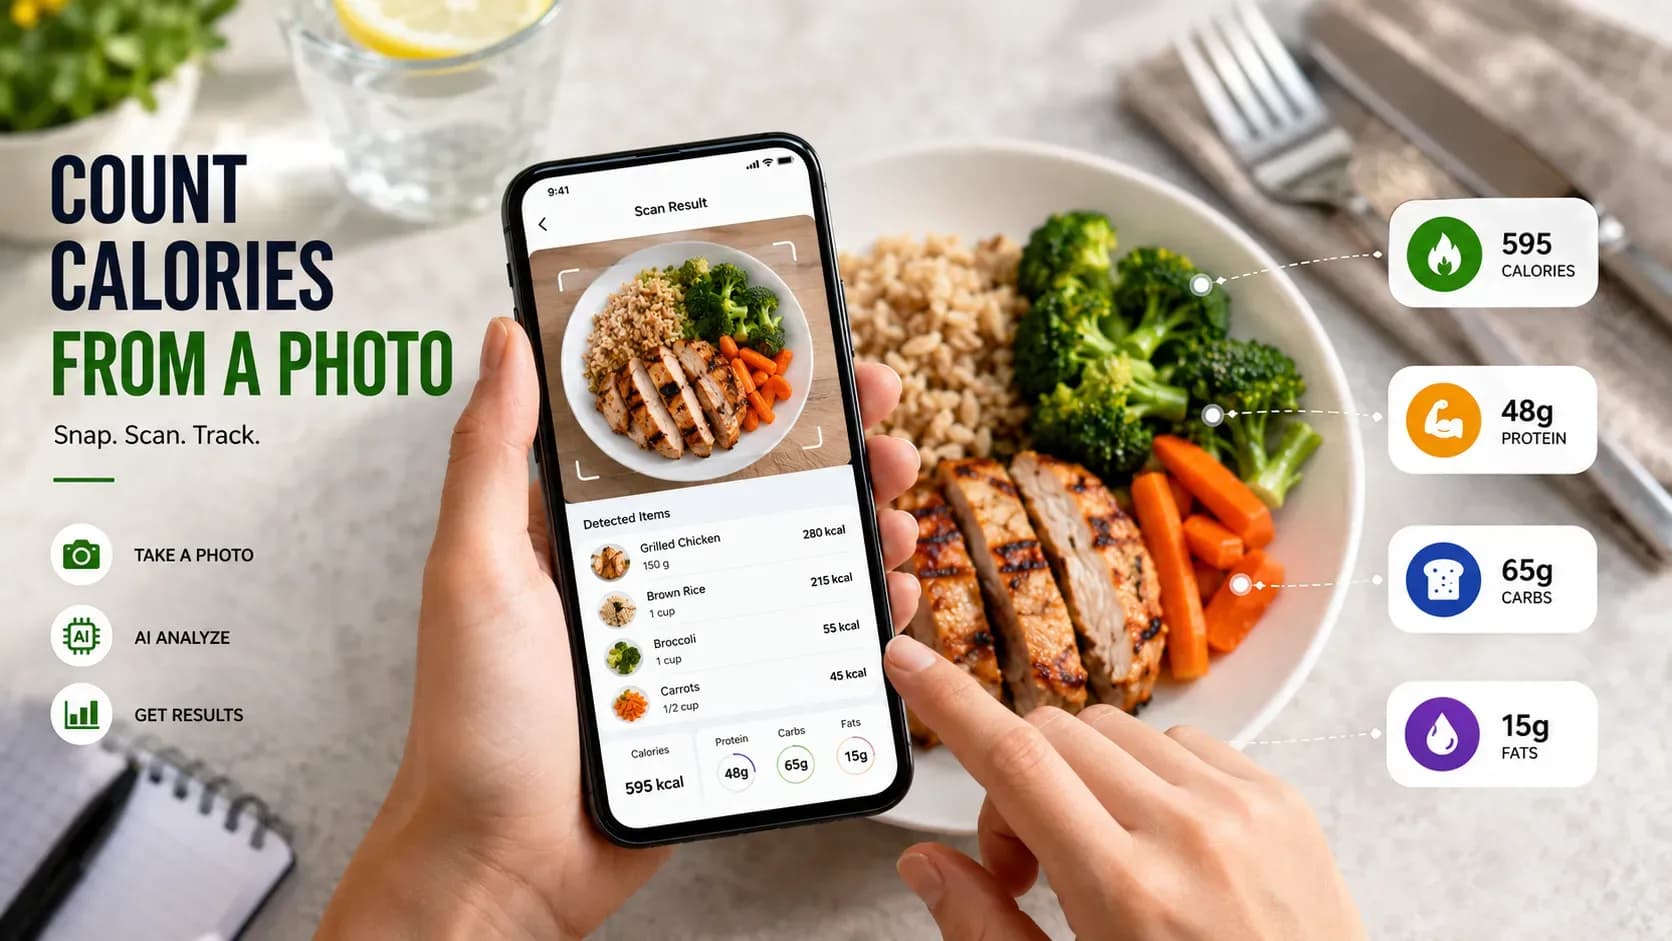
- Wait a few seconds while the AI identifies each food item and estimates portions
- Review the identified items as they appear on screen
Most tools will break the meal down item by item, showing a calorie and macro estimate for each component rather than a single lump number for the whole plate.
Step 5: Review and Correct the Breakdown
This is the step people skip most often, and it's the one that most improves long-term accuracy.
- Check that each food item was identified correctly. A stir-fry might get logged as a generic vegetable dish when it actually contains meat and oil.
- Adjust portion sizes if they look off. If the AI estimated a smaller or larger serving than what's actually on the plate, correcting it manually fixes that single entry and often improves future estimates for similar meals.
- Add ingredients that aren't visible, such as oil used in cooking or a dressing mixed into a salad, since these carry meaningful calories that a photo alone can't always detect.
A quick 10-second review turns a rough estimate into a number you can actually rely on.
Step 6: Save the Entry and Track the Pattern
Once the breakdown looks accurate, save it to your daily log. Over time, this is where photo-based tracking becomes genuinely powerful.
- Daily totals build into weekly averages, which matter more for weight goals than any single meal
- Repeated meals get faster to log, since the app recognizes familiar dishes more quickly with use
- Patterns become visible, such as which meals consistently run higher in calories than expected
Tracking one photo at a time might feel small in the moment, but the accumulated data becomes a clear picture of actual eating habits within a couple of weeks.
Common Mistakes to Avoid When Photographing Meals
A few small habits quietly reduce accuracy across many photo-based logs:
- Photographing a plate that's already half eaten, which leads to underestimating the original portion
- Taking the photo from far away, where the app struggles to read fine detail
- Skipping sauces, oils, and toppings because they seem minor, when they often carry a large share of the meal's total calories
- Never correcting obvious errors, which means the same mistake repeats meal after meal instead of improving
None of these require extra effort to avoid, just a bit of attention before and after the photo is taken.
Conclusion
Counting calories from a photo isn't about pointing your phone at food and trusting whatever number appears. It's a short process, plate setup, angle, lighting, a size reference when needed, and a quick review of the results, that takes an AI estimate and turns it into a number worth tracking. Once that habit is in place, logging meals stops feeling like a chore and starts feeling like a five-second step in your day.
Ready to try it yourself? Open your photo calorie counter and snap your next meal using the steps above.